 LET'S ALL BECOME AMERICA'S NEXT TOP MODEL LET'S ALL BECOME AMERICA'S NEXT TOP MODEL, builders |
|
|
|
  |
Replies(1 - 7)
| Walrus |
 Aug 10 2014, 06:07 PM Aug 10 2014, 06:07 PM
|

ã¡ã‚‡ã†ã¡ã‚‡ã†ã•ã‚“
      
Group: Angels
Posts: 431
Joined: 17-March 07
From: SPACE
Member No.: 830

|
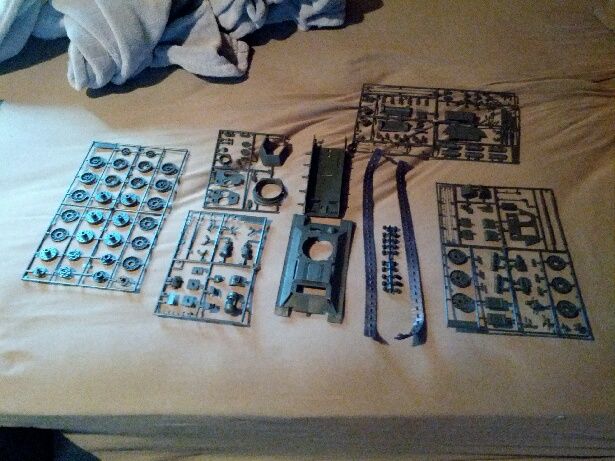
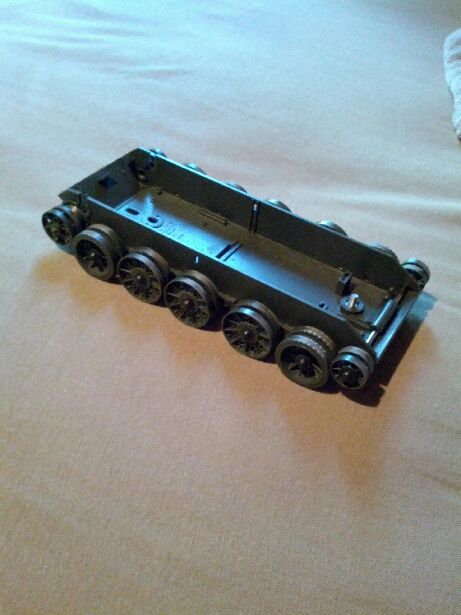
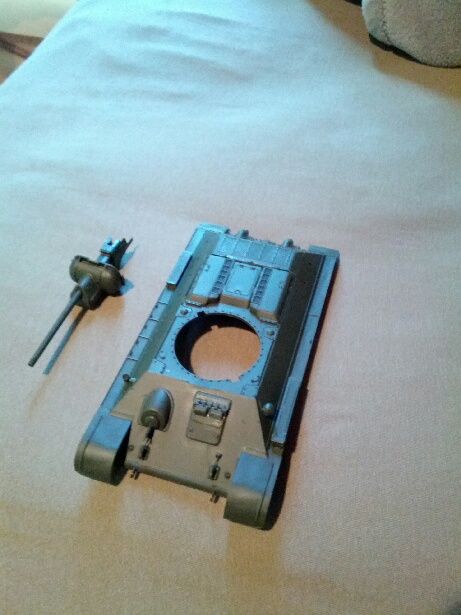
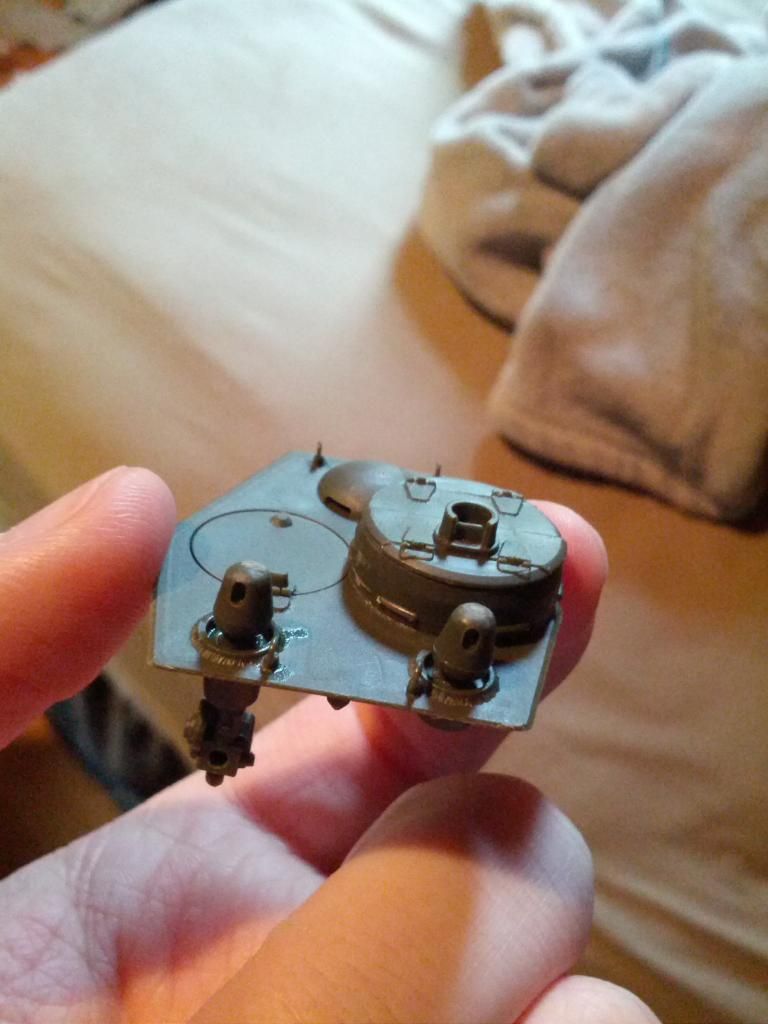
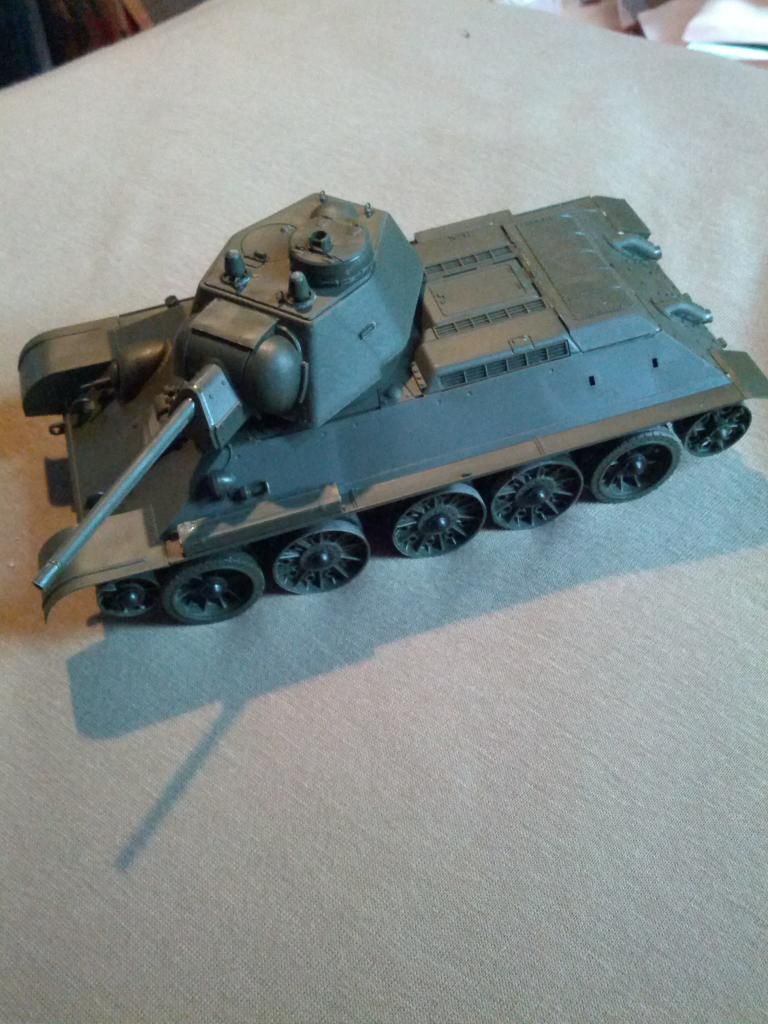
Here's my log/progress/thoughts on building Tamiya's T-34/76. Using some Tamiya Extra Thin Cement for gluing and plain sprue/wire cutters, hobby knife, tweezers and sandpaper for removal/preparation. Sprues and stuff: » Click to show Spoiler - click again to hide... « All the bits listed in the instruction booklet seemed legit, so I guess that's good. It also came with a boring decal sheet and some metal rod/screw/nut. And a warning about setting the sprues/yourself on fire. Lower Hull: » Click to show Spoiler - click again to hide... « Completed suspension and whatnot. No idea why the "idler wheels" needed a metal rod held on by a screw, but it's probably something to do with optional RC parts. Maybe. I'm actually not sure how that would even work. All of the wheels are capable of spinning, and held in place by some rubbery knob things instead of being cemented. Upper Hull and Gun: » Click to show Spoiler - click again to hide... « Glued on various detailed bits to the upper hull, and assembled the gun. The gun pieces sort of fit around/through the mantlet, so you can move the barrel vertically a bit(dat Soviet gun depression doe). The venty bits and rear plate didn't really meet the rest of the hull perfectly, but I guess it's not all that important. Also the driver's hatch isn't glued in, and can sort of open and close. Turret Top: » Click to show Spoiler - click again to hide... « Glued all the tiny bits to the top of the turret thing. Using the version with the commander's cupola, because it looks cooler. This was 14 pieces(one's hidden underneath for the silly people figures that I'm not using). And yes, some of them are slightly tilted and there's minor excess glue, I'm not a wizard. LE TONK: » Click to show Spoiler - click again to hide... « Everything basically slammed together after I glued the few edges on the actual turret together, so I just took a picture of that. The top said "just insert," so I haven't glued it, but it wouldn't be that difficult if I had to. No idea if I should glue the hulls together, since they kind of snapped/rubberythingsthatheldthewheelson'd together, and seem sturdy enough... The hobby store I ordered paints from got them in already, so I guess I'll go get those and some primer on Wednesday, and start painting it soon. I'll probably spend tomorrow attaching all of the INCREDIBLY FUCKING TINY handrails and whatnot. Oh, and I have to melt the tracks together.
~~~
COME ON BOYS LET'S GO KILL SOME BOOOOOOAR
|
|
|
|
|
|
| Rhiannon |
 Aug 10 2014, 06:46 PM Aug 10 2014, 06:46 PM
|

I'm really moved by the chicken bone
           
Group: Gods
Posts: 2033
Joined: 23-December 05
From: Minnesotablarg
Member No.: 4

|
OH BOY TIME TO MAKE A POST THAT'S BAD AND TOO BIG I LIKE ZOIDS I'VE MADE LOTS OF ZOIDS AND DESTROYED 90% OF THEM TOO. I PACKED AWAY SOME INTO BOXES AND DON'T REMEMBER WHAT I'VE DESTROYED AND WHAT I'VE BOXED BUT I DO KNOW WHAT I HAVE NOT DESTROYED AND WHAT IS UNBOXED. RANDOM CRAP FIRST: » Click to show Spoiler - click again to hide... « THIS IS A BERSERK FURY (UH, LIKE, PROBABLY AN AMERICAN HASBRO (MORE LIKE HASBEEN I HAVEN'T SEEN ZOIDS IN THE US IN AGES AND I KEEP DREAMING OF FINDING RANDOM CRAP IN TINY STORES BUT IT'S NEVER GONNA HAPPEN) RELEASE DUDE. THE SECOND ONE I EVER HAD. I believe this is boxed. this is a crappy picture of a Genobreaker (again, oldamericalandthing). I think I've also had two of these. This depresses me. It's focusing on some lame keychains but it's also the only picture I have of a kind of cool model I don't have anymore, the RAINBOW JERK (TL NOTE JERK IS ZOIDIFIEDMOON FOR PEACOCK YOU COCK). I remember when I was building I was thinking to myself about how shitty it was and how Zoids were seriously going down the drain with all these easy to build models that take like two seconds and have only a handful of parts to actually put together but I really liked the tailfeathers okay. :( Here is a picture comparing the innards of my Berserk Fury and a Gairyuki. I just stopped in the middle of putting the Gairyuki together when I realized it and started stripping the other. And then I pasted random pictures from the back of the box or something for... reasons? I don't know, ask me eight years ago. Anyway, I really like the instruction manual for this Gairyuki kit so I kept it it was very pretty and had colors. Gairyuki complete! I told its stand to go screw itself he doesn't need a stand. He's kinda cool but blox ruined the world. Pretty sure I once owned a blox Murasame Liger or something. It was so crappy I don't even know why anyone would. THE LAST ZOIDS MODEL I MADE (I PUT THIS TOGETHER UH, LIKE 8 YEARS AGO OR WHATEVER) WAS KOTOBUKIYA'S BLADE LIGER. Some pictures will actually be posted in this spoiler, but they're small and that's why. JUST WARNING YOU. » Click to show Spoiler - click again to hide... « I took a lot of tiny and useless pictures and if I hadn't chopped off his legs and head and stuffed him into a very small box, I'd have way better pictures now. But this is all I've got. 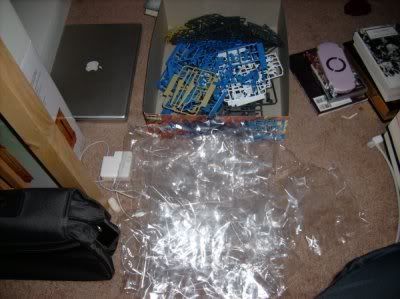 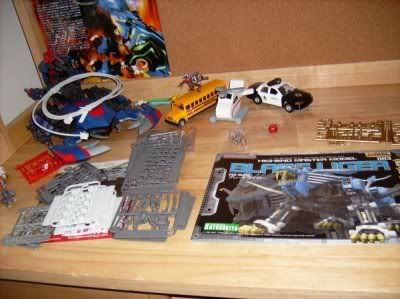 The result of taking everything out of the box and removing it from the plastic bags. My god, what a mess. I think I liked this instructional manual a lot too. 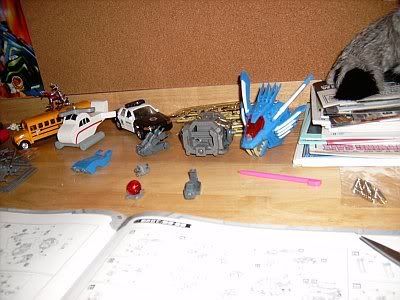 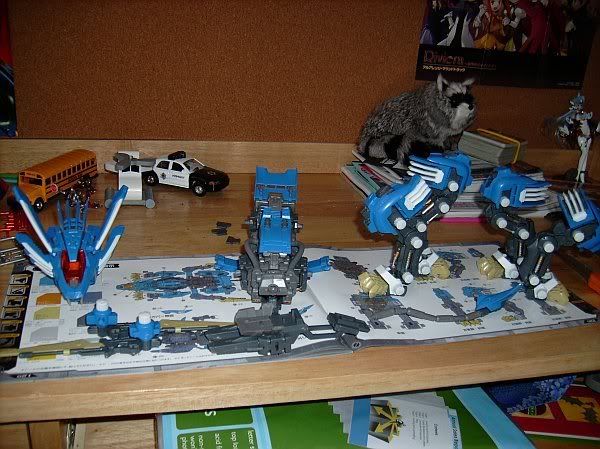 Progress. I remember the mane parts had some absurd number of pieces so those took forever. At least the detail in this thing was great. Made up for being a pain that actually forced me abandon my usual habit of putting together the whole thing in one sitting. Forget one sitting, I had to finish it the next day. :( I'm also going to be honest, I'm not sure if I put the Zoid core part (the little red ball) in properly, because the torso was always weird about that. It was kind of a cool touch that they had Zoid cores, though. Hasbro/Tomy/whoevermadetheolder ones never bothered with that. Completed Blade Liger standing next to the Black Impact Blade Liger. Just so you can see how much more badass Kotobukiya made this thing look. Looking his cutest. My overall thoughts on this was that it made me very angry! Some things were stupid and didn't work seem to work right, and I distinctly remember parts breaking extremely easily. There was one part in the leg inside bit, the little gray parts in the middle (or was it the gold part?) if you look at the cutepicture, that definitely broke. I had to glue it. And something in the overly complicated blade movement mechanism was also way too fragile, and I basically had to glue one of the blades in the open/out to the sides position. These little things I wasn't at all used to dealing with in Zoids models frustrated me so much, but what was more frustrating was that I really had no desire to ever make anything that wasn't on Kotobukiya's level again, at least with things where that was an option. I'm sure I'll get over everything and buy more some day, but that got me out of Zoids models for so long, man. I lied I was too lazy to take pictures of the other things that I can. Maybe next time. All that's waiting for you is tiny planes and bugs, a cardboard car (or two?), and a Death Stinger and Stealth Viper.ZOIDS DEATH STINGER AND STEALTH VIPER » Click to show Spoiler - click again to hide... « 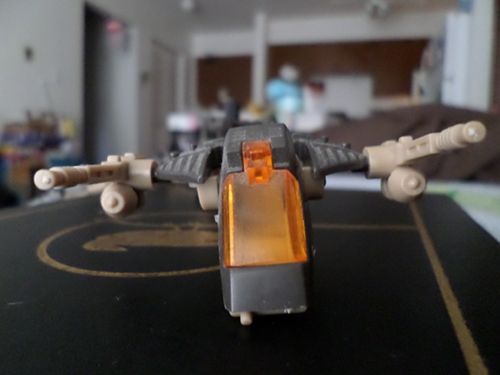 HELLO I AM A CUTE STEALTH VIPER. I LIKE THE STEALTH VIPER. But this one has at least one piece broken off (at the end of his tail, that out of place white is the brokenpart) and I would fix him if I only knew where the piece went. :( 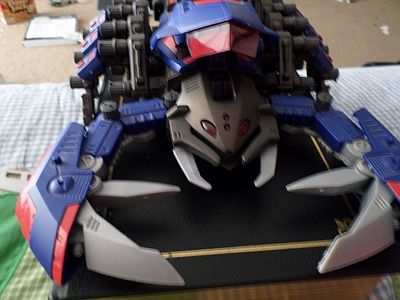 HELLO I AM A CUTE DEATH STINGER. The Death Stinger is actually one of my favourite Zoids. A scorpion seems like such a clever design choice. Just look how sturdy that thing is, and how many weapons they've got hidden on it. Plus the anime made it a total badass, way more dangerous and cool than the actual final boss was. I'm missing one of his leg armor plates, but feel like it's probably just on the floor under my bed. Either way, this my second or third Death Stinger and I know I kept the corpse of one of them, so I'm sure I can fix it if I just go through those boxes. Also putting him on that book was a mistake. He's too big for his legs to touch the book, so he kept sliding off because... he has wheels... why does he have wheels again? Did he have battery-operated wheelsmovement?! Why didn't Kotobukiya make a Death Stinger. :( OKAY HERE WE GO WITH LESSER-KNOWN STUFF GUYS. FIRST, SOME CRAPPY $2 CARDBOARD CAR SNAP-TOGETHER MODEL I KEEP FINDING AT EVERY CUB/CASHWISE IN MINNESOTA AM I BANNED FROM THIS TOPIC NOW » Click to show Spoiler - click again to hide... « 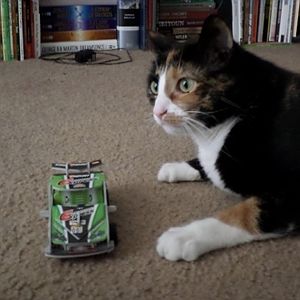  It is a wonderful green car of cardboard. I have made like ten of these and destroyed every single one of them because I'm going to be honest, I just like building models. If I break them, I can make them again. Make sense? Except I don't think I've ever been responsible for breaking them. It's always airplanes, or my brother, or horrible accidents, or, like in this case, cats. It's already missing a piece in the second picture. And then recently I've been getting into these models called Metal Earth, from some Fascinations company. They don't need glue, but they don't really snap together either. Most things are held in place by twisted or folded metal tabs. I only found out you were supposed to twist some of the tabs like, after I made all of these. You're also supposed to use a pliers, but I never did. This means I used shenanigans to put together all of these poorly, and that it hurt my fingers a lot and ruined my thumbnails (which I used to fold tabs down, not paying much attention to the fact that my nails are just as fragile as my skin/blood vessels/joints/whatever). AND YOU'LL SEE, THEY STILL LOOK AWESOME FOR LITTLE $10 THINGS THAT CAME FROM A SINGLE SMALL SHEET OF METAL NO MATTER HOW CRAPPY YOU ARE » Click to show Spoiler - click again to hide... « Mustang P-511 2 3This was the first one I made and somehow I made no disastrous mistakes. I could have bent its wheels better, but it didn't occur to me to just wrap it around a pencil soon enough, so there. I don't like it very much, but that's because I don't like the plane itself. The model's fabulous. It just happened to be in a set of three I got. There was also some helicopter in it but I broke it because I'm too forceful with things so I glued it and then the crappy glue I bought (since I couldn't find my old stuff) broke anyway, so I just threw it away. It was a lame and crappy helicopter anyway. NEXT. Fokker D-VII1 2 3I love this thing so much. It helps that I like the plane to begin with. But then there's all that glorious detail on its wings and, like, proppeller... thing. fuck plans. The random pinks you see in these pictures is the reflection of my pink blanket. Gosh these things are so shiny and reflective. Anyway. This one is really solid and stuff, and I'm pretty sure I remembered doing some step out of order when it came time to attach the wings, because it looked like it wanted me to do something that would make it impossible for me to access parts I'd still need to access. Ignoring the instructions went perfectly. I kinda messed up on the tail part, which you should be able to see really well in 2. You were supposed to twist those tabs, not fold them. But I didn't know about twisting tabs since I didn't bother to read the words in the instruction sheet (I'm used to it all being moonrunes so leave me alone) past "RECOMMENDED: A TINY PLIERS", so the whole thing is really shaky. Somehow, though, it's never come apart. I even put it to the ultimate test inspired by my dreams (CAN IT SPIN SIDEWAYS TO TAKE OFF?). Let's see how it fared. 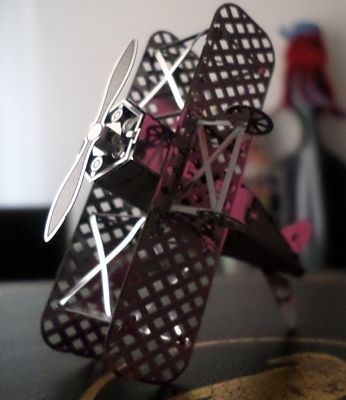 This one's a winner. Praying Mantis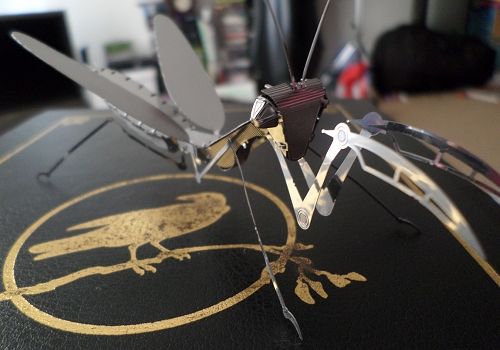 I don't like him very much. When I was building him I got confused at some point about which way to put on the metal strips that made up its butt, and then I missed a step with his head so that's wrong. The whole thorax part never made any sense to me, either, and I'm not sure what it expected me to do with his legs. He can't really stand on them without shenanigans, and if I put him down on a plastic surface it'll make him sort of hop a bit to the side until he loses momentum (which is fast). I don't know. Those eyes murdered my fingers. If you look closely in the buttpicture, you'll see the raven design from the book its on reflected on his wings. After seeing that myself, I decided to take him outside. I stuck him in an exploded tree root and then he Mantis'd it up and prayed for green pigment ha ha I'm so clever. BUT THIS IS REALLY CUTE GUYS OKAY I LOVE THIS PICTURE THAT IS ALL UNTIL I MAKE SOMETHING NEW, WHICH SHOULD HAVE MORE IN-PROGRESS TYPE PICTURES AND BLAGGING SINCE I LIKE THOSE THINGS. But one day... I will buy the appropriate glue and I will build the Yamato. Stepping very outside my comfort zone after being traumatized by some stealth bomber model kit I tried when I was like 8. This is a good topic. This could be a healing topic.
~~~
 |
|
|
|
|
|
| Rhiannon |
 Aug 31 2014, 08:46 AM Aug 31 2014, 08:46 AM
|

I'm really moved by the chicken bone
           
Group: Gods
Posts: 2033
Joined: 23-December 05
From: Minnesotablarg
Member No.: 4

|
THIS POST IS FOR ANOTHER ZOID. KOTOBUKIYA'S HIGH END MASTER MODEL THINGSSSS VERSION OF LIGER ZERO SCHNEIDER JAGER. They spelled it that way, not me. It just makes me want to mispronounce it though. TOOLS USED: That scissors that I nearly sliced my finger off with while absentmidedly drying it off after cleaning it. It deserves to be dulled by plastic. Anyway, this is mostly just pictures with ramblings from notes and things I remember from building it. I don't know what else to do. I also counted pieces because I couldn't understand how things like making all the armor pieces for a single leg was taking me 40 minutes. Seriously, this whole thing took me the majority of two days, and I really felt like I pushed myself hard to finish on that second day. AND YES I DID HAVE TO SIT DOWN AND DEAL WITH IT LIKE THAT I CAN'T JUST DO SOMETHING ELSE WHEN THERE'S A THING IN THE MIDDLE OF DOING UNBOXING » Click to show Spoiler - click again to hide... « So I decided I wanted a Liger Zero and chose one that came with my favorite armor: Schneider. You know, the red one with all the sharp objects everywhere. I ORDERED THE RIGHT THING OKAY AMAZON EVEN STILL SAYS "SCHNEIIIIIIDERRRRRRRRRRRRRRR" I open the box and SURPRISE HAPPY CHRISTMAS 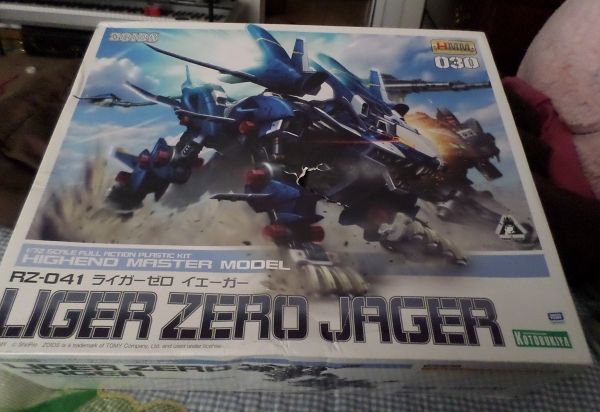 So blue, so much damage. How do you manage to not only send the blue one instead of the red one (it's not like they're that similar or have the same numbers or anything like that at all) but also punch the box a few times on the bottom and left side and just. Stab it with a knife right in the middle there. It's hard to tell because I made the picture unnecessarily small, but it's that jangly white bit over his leg/chest. I really like the boxart on these things so that depressed me, and also made me worry that something inside may have been damaged by whatever knife they used to stab my (terribly blue and lacking in blades) box. I never had a Jager, though, save for some really horrible plastic action figure I bought at Target or something back when you could do that in America... but even then, the box said it was Panzer. And it WAS green... Still, it was a Jager. But I never had a model, or any GOOD toys. And complaining about things is such a hassle, so I decided to just go with it and not say a word. THE HEAD » Click to show Spoiler - click again to hide... « I actually had to shave off parts on the front two teeth piece to get it to fit in the face properly, since it kept popping off whenever the sideteeth parts were put on tightly. They made fronteeth bit too big on the bottom/connecting bit. :( All it did was tell me to use the nippers. BUT HOW COULD A NIPPER HELP ME WHEN THE PIECE WAS ACTUALLY JUST TOO BIG, NO CONNECTINGBITS LEFT OVER. Taking the bottom teeth piece from the frame was so painful. I usually try to bend/twist pieces out after cutting enough that I can since they generally seem to come off better if you do that, but these teeth are so sharp, man, and they did not want to twist. Taking the eyes/cockpitwindows piece out was almost dangerous. It was in some tiny bright orange SPRUUUUUUUUUUE but I didn't realize there was another piece in there and almost threw it away after taking the eyepart. But nope, there was a second part in N, and it's just some tiny square that couldn't possibly be useful for anything. I kept it to be safe. As someone who is used to the old Zoids models, I cannot help but feel amazing and wonderful when everything fits snugly into place on the head. So many times in the past has putting the head together required becoming a fingeroctopus. Parts that move didn't stay put until they were locked in place by the other side, so for heads this meant you'd have to keep a bunch of pieces (like a lower mouthpart, the neck, and whatever other things might be required for that particular model) held into one half of the face and in position to fit into the second half of the face properly. It's impossible how did I do it a million times. But with these guys if you jam it in, it stays in instead of falling over immediately, and screw necks we use ballnecks here. So much easier. Much less octopus. thank you for listening. 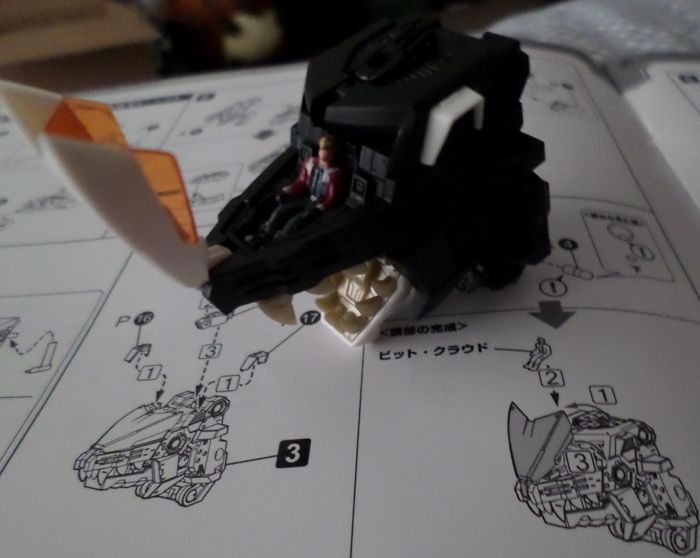 OKAY GUYS I HOPE YOU'RE READY FOR A VERY IMPORTANT STEP VERY IMPORTANT TO DO IN PROPER ORDER STEP 1 OPEN COCKPUT SETP 2 INSERT BIT CLOUD (WAIT DOES THAT SAY PIT I NEVER WATCHED THIS ZOIDS SERIES IN JAPANESE) STEP 3 CLOSE COCKPIT (I missed step 3). You probably won't understand, but I couldn't stop myself from smiling like an idiot during this step. They acted like it was so important to do it in that order, which you understand. But what you don't understand is what inserting Bit Cloud into the Liger Zero means to me. I once had this huge action figure of Liger Zero, and if you stuck Bit Cloud into the pilot seat, it'd push a button that made it spew out a recording of him saying "THE NAME'S BIT CLOUD!" but the button was so, so sensitive. So whenever I put him into the cockpit, it was always "TH-TH-TH-TH-TH-THE NAME'S BIT CLOUD!" and :( I told you you would never understand. FUN FACT: THE HEAD IS 23 PIECES, PLUS 33 MORE WITH ALL THE JAGERBITS ON. TORSO AND LEGSTIME » Click to show Spoiler - click again to hide... « 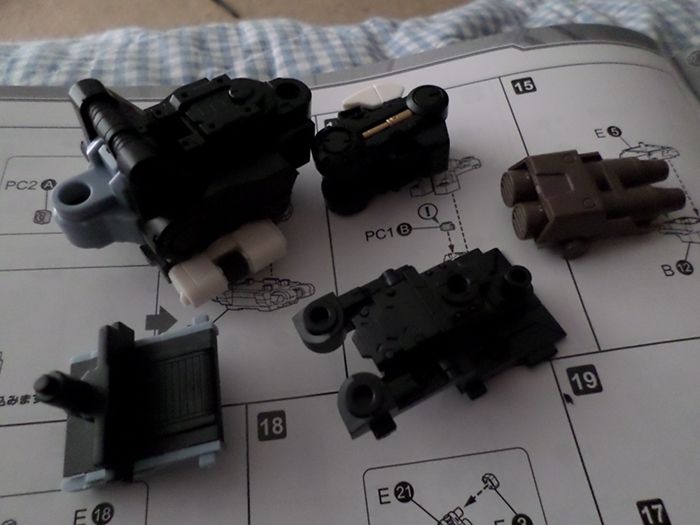 Have some random torso parts. Butt not included in picture, but I do want to note that putting the butt on was kinda hard. Most of the moving parts are handled with this crazy rubbery plasticy material, which works great and keeps everything really tight and secure so they only move when it's actually intended. But they can be so hard to actually get pieces into, man. This isn't even all the torso, but the whole body is 91 pieces, plus 63 more when you get Jagerstuff on. Most of that is Jager's boosters, admittedly. 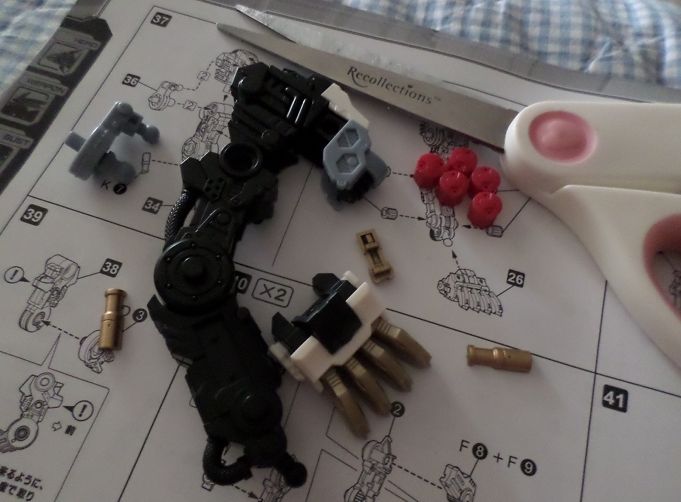 SHOWING OFF SOME LEG NOW. Also you can see my lovely scissors here. Isn't it disgusting how it tries to be so cute with that pink heart, yet the blades look like they could give you tetanus. I don't think I was vaccinated anywhere near recently I think I'm going to die. I'd also like to point out that this thing, judging by the brand name, is a scissors for scrapbooking (ie it cuts paper and paper). I usually use fabric scissors since they're stronger. But I guess the distinction was pointless after all. If it can cut flesh by accident, it can cut plastic. SO ABOUT CLAWS. They're really sharp. They got caught on my bed a billion times whenever they weren't on the instructions. For each leg, there's this blueish part that's used to connect to the body. To make it there's this tiny little nail/sticklike part that you have to put into a tiny hole to lock a hinge piece in place, but it won't go in all the way unless you make sure the tiny notch at the insertingend of the nailpiece is facing up. I saw this warning on the instructions all four times I had to deal with this and tried really hard to make it perfect but I had to take it out and redo it every single time. :( Front legs are 46 pieces, plus 22 more in Jagerstuff. Back legs were 52 pieces, with 21 more in Jagerstuff. TAIL AND ZOID CORE STUFF » Click to show Spoiler - click again to hide... « So the tail. The tail was the most painful thing I've ever consented to for something that's meant to be fun. It's also more painful than some medical procedures involving needles. NOT JOKING. See, there's like three sections on the tail, so you have to do this one step three times. There are like four parts in each section, and one of the parts is really small and has this very small pillar part that goes through a hole. You have to use a lot of force to get it in because like everything it fits fabulously, but then once it goes in it's like a ginormous needle stabbing you in the finger when the pillar finally hits the end of its hole... because it juts out past the hole to connect to the next piece and by the next piece I mean your finger. It's slightly worse than having your finger pricked for a blood sugar check. Everyone knows what that feels like, right? ... right? Anyway screw the tail I made a sound all three times. Because of the SUDDEN PAIN. Also the tail was 15 pieces (woo!) without the gun part, since you take that off for all of the armor changes anyway. The Jager armor adds 5 pieces to that tail which seems far too reasonable to be true... [18:33:24] <Guest57231> Oh god [18:33:25] <Guest57231> N2 was real MY REACTION WHEN I FOUND OUT THEY ACTUALLY WANTED ME TO USE THAT TINY ORANGE BOX PIECE I ALMOST THREW AWAY. I was hoping it wasn't really real. 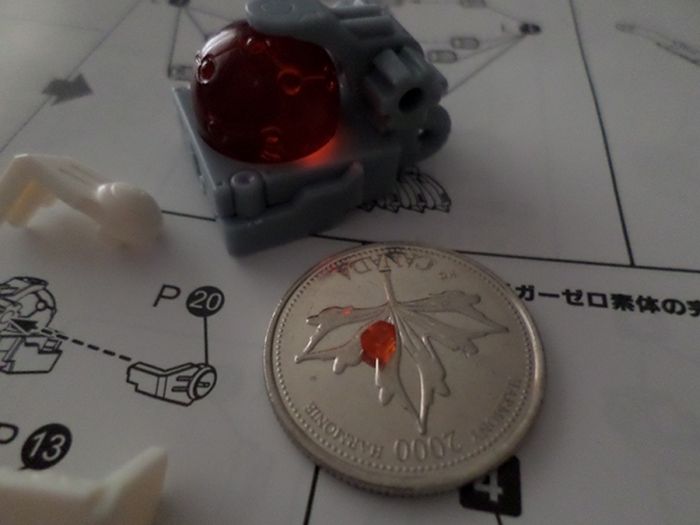 Here is N2 on a quarter (Canadian but screw you it's not my fault people kept giving us random Canadian change in notcanada, which is in America). Just so you know how small it is. This also has the Zoid core and its holder thing in it. I dunno. I mostly only took this picture because WHAT THE HECK N2 I PUT IT IN BACKWARDS AND COULDN'T GET IT OUT AGAIN FINISHING UP LIGER ZERO. » Click to show Spoiler - click again to hide... « 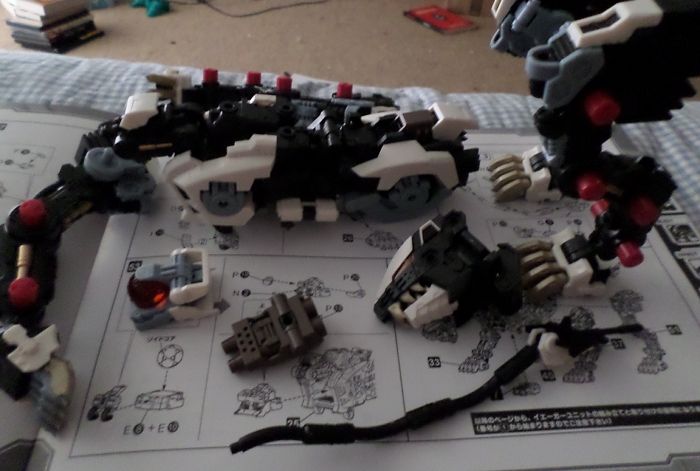 All the parts for an unarmored Liger Zero. I sure do like it when legs can stand up on their own. Also the Zoid Core part slid in very nicely. I was impressed after all the massive confusion I remember having about the Blade Liger's that continues to this day. Anyway, this thing was waaaay more sturdy than I remember their Blade Liger being. I remember always thinking "what is the point in being this flexible if everything falls apart if you look at it wrong" but the Liger Zero was so well done that I... actually couldn't even take off his legs when I wanted to to make it easier to put on the stuff for the Jager armor. TO TEST HIS FLEXIBILITY I SET HIM UP AGAINST HIS CHILD, THE MOST FLEXIBLE AND GOOD ACTION FIGURE ANYONE EVER MADE OF THE LIGER ZERO (THAT I KNOW OF I GUESS, I'M NOT ACTUALLY THAT INTO THE TOYS). In the nude. 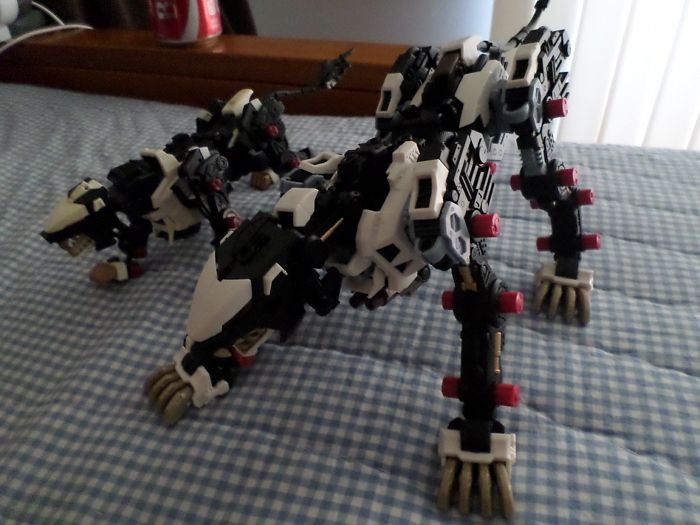 I tried to make them do the same pose, but the pose never looked right with the action figure and he was ten million times less steady in it. As far as I'm concerned, man, this thing has made all Liger Zero toys obsolete. It's more flexible than all of them, more detailed than all of them, involves a fabulous manyhours of building time during which you are clearly in another world, and it's bigger than most. So impressed after all those mixed feelings from the HMM Blade Liger. I also don't remember having any real worries about pieces breaking, or anything like that. It never happened even when I wasn't being careful. My mother told me that the Liger Zero looked like a skeleton and that I needed to hurry and put his armor together. » Click to show Spoiler - click again to hide... « SPOILERS I DIDN'T WRITE ANY NOTES AND ALL THE INPROGRESS PICTURES I TOOK WERE TOO DARK OR COLORWARPED BY MY LAMP TO BE OF ANY INTEREST. But I do have random things I remember, like thinking the boosters were totally hot. And getting mad when I realized they would barely be flexible at all because of how they were attached, and were also attached to the body by the flimsiest, scariest pieces ever. I don't dare try too hard to move them. That stuff'll snap in an instant, I just know it. There were also a lot of parts that were moulded in the stupidest possible ways. It was mostly the white parts that were like this, but so many were connected at the stupidest places that were bound to cause massive issues that no amount of skill or propermodellingtools was ever going to fix. There were also random parts that were movable for no apparent reason, which just made the whole thing feel shakier without adding anything useful or cool. And the tail part for the tail? It's too heavy, I think, because after I put that on the tail kept coming apart at random sections whenever I happened to even lift the stupid thing up (as in, I didn't have to touch the tail to make it explode). Another complaint about those white parts is that a lot of them were just supposed to sort of stick on to other parts. With magic, I guess. Most of them stayed on fine, but it didn't surprise or confuse me at all that two of the parts (one was one of the wingbits on the back hip, and the other is a white part on his head near his eyes) popped off whenever I wasn't looking. And when I WAS looking. At least it's always the same two. I might stick some glue under those two... Anyway, completion. 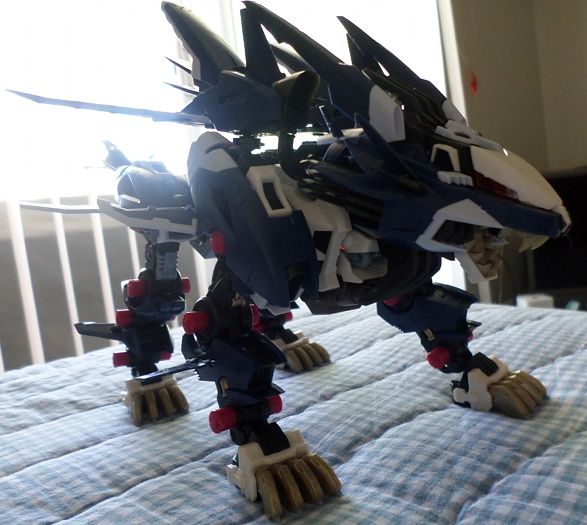 Frontish. I'm not really a good pictures person. I like how you can see part of his Zoid core here though. That little orange glow in the chestarea. KINDA COOL. 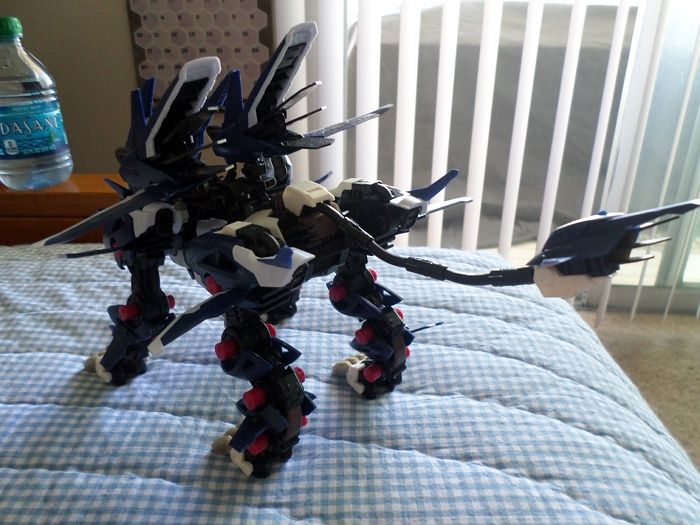 THE BUTT EVERYONE LOVES BUTTPICTURES 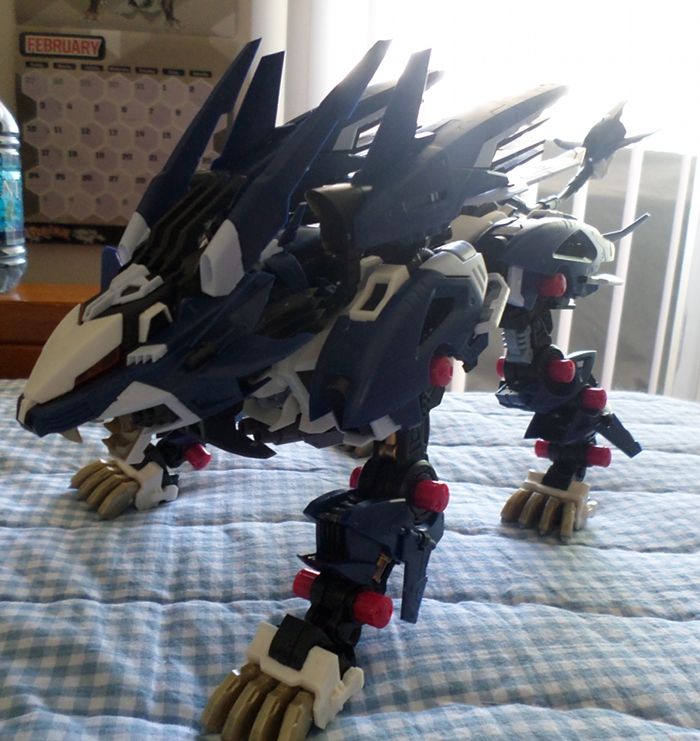 Not very imposing without all the pointy stuff sticking out. 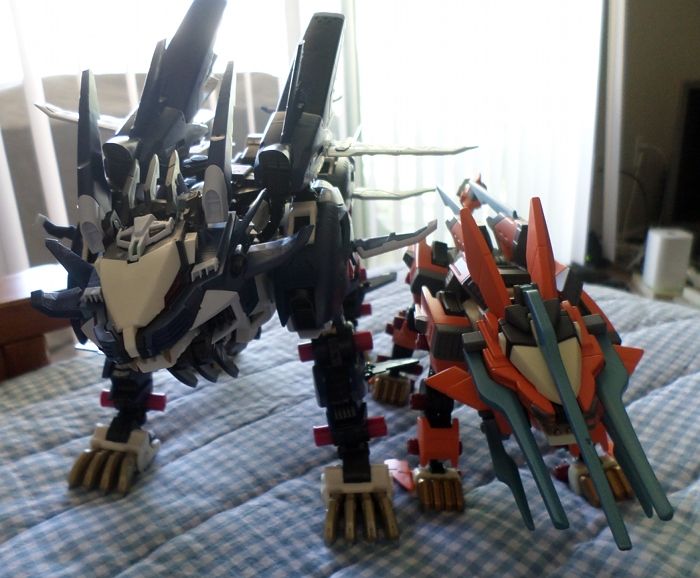 OVERALL THIS WAS A VERY DISAPPOINTING SCHNEIDER BECAUSE IT WAS A JAGER AND HAD PROBLEMS THAT MADE ME FEEL KIND OF AMBIVALENT OF THIS AS A WHOLE BECAUSE ONLY THE LIGER ZERO PART WAS GOOD THE JAGER PART LOOKS GOOD BUT IS BAD. At least it can still headtilt despite all that added bulk. Also this above picture is making me think that the reason they sent me a Jager instead of a Schneider is because they didn't want me to impale myself through my hand with one of the Schneider's blades, which would no doubt be xboxhueg and actually sharp, unlike how they are on this toy (which is the same toy I took the nakedpictures with, in case anyone was curious). But I still want an HMM Schneider... I WANT to stab myself through the hand with those blades.
~~~
 |
|
|
|
|
|
| Rhiannon |
 Dec 30 2014, 01:03 AM Dec 30 2014, 01:03 AM
|

I'm really moved by the chicken bone
           
Group: Gods
Posts: 2033
Joined: 23-December 05
From: Minnesotablarg
Member No.: 4

|
Now it is time forrr Kotobukiya's highendmastermodeldeblargalarg Genosaurer, Raven version. Because yo, I enjoy having more red and absolutely no random light purple. Plus, it came with a little Shadow figurine and even though I already have one (one that actually has wings, too) I think this is a very good thing. Unlucky me, three whole pieces were already fully detached from their spruuuuuues when I was cutting open the billions of plastic bags they come in. :( Sniff. Also one of these other pieces was kept in at eight different parts. That seems unnecessary and it is a thing to complain about them being too careful after complaining about things coming out prematurely. Yeah. I actually built this thing like months ago and didn't write good notes so my commentary could THE HEAD. » Click to show Spoiler - click again to hide... « 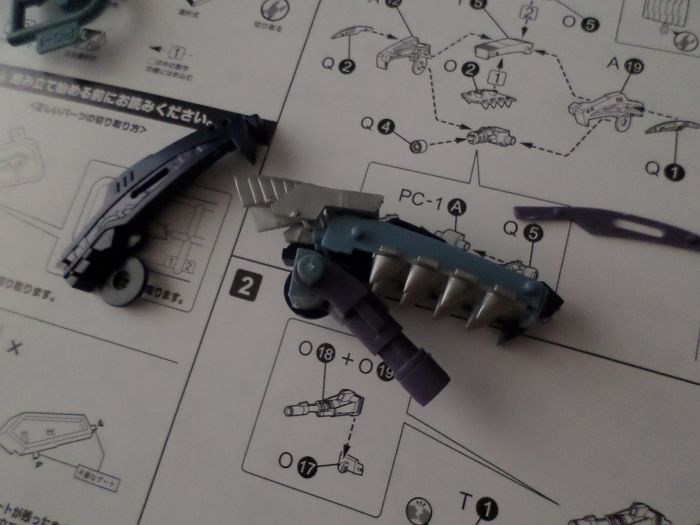 PUTTING A LARGE SHAFTICAL-SHAPED OBJECT IN ITS MOUTH I SURE DO HOPE I PUT IT IN THE RIGHT WAY. The U pieces are awful in this, because they're obnoxious inflexible transparent orange/red/something plastic. I tried to twist out the pieces for his eyes but they weren't budging at all, so I decided I had to take a scissors to at least one of the connecting parts. So I lowered it deep into the box and got ready... snip. Tiny red piece goes flying, bounces off of box edges and lands about a foot away from workspace. Thanks, physics. But that was not my end of problems with those pieces. These pieces are really small so it's incredibly difficult to shave off excess stuff, and transparent plastic is always extremely interested in showing off every bit of damage it possibly can. Except they fit so tightly into his eyesockets that they NEED to be absolutely free of any possible excess plastic. Despite slashing at these pieces randomly with a scissors in my angerrrr one of them would not fit in its place nicely at all, which meant that the clear strip that goes over the eyes couldn't stay in place. I'm pretty sure I only got them all the way in place with magic, since the one eye piece never did go in right. The clear strips themselves are like impossible to not damage when removing from sprues, too. So impossible they apparently weren't able to hide it in the pictures all over the box. Also the gun on his head likes to fall off. :( NECK AND BODY THINGS » Click to show Spoiler - click again to hide... « 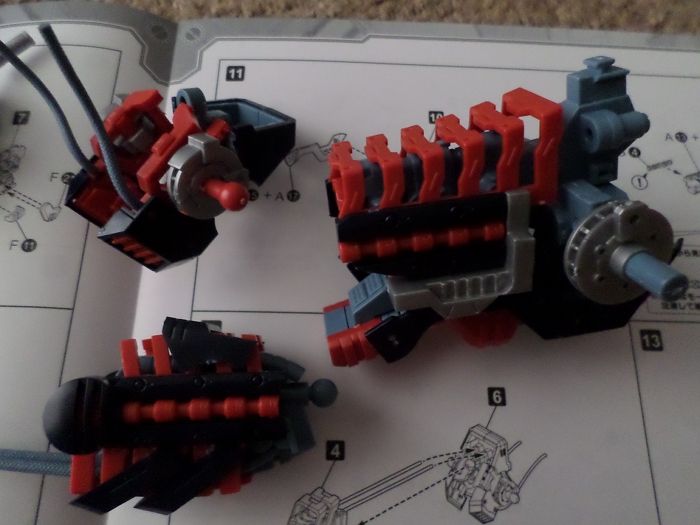 Have some random neck and body parts. Some of these look like crazy futuristic inventions right now and I can't imagine their use in the model. I really hate the body. Really hate. I don't know. Things didn't seem to be attached in any logical way, or in a way that would never work even in my dreams. Some stupid red ribesque part was particularly frustrating for me, though I don't really remember much details. The cockpit is super dumb, too. It's basically non functional, since you can't open it without removing it entirely, and it's held in his chest in an extremely shoddy fashion that makes me ask "IS IT IN RIGHT OR WHAT" but that is the only way it can go in. :( Also sliding all these pointless wires through tiny curved bits and making sure they end up in the right places while connecting the torso parts, with a hooklike part that also requires force. Thank goodness there was room enough for me to stick my finger in while my other hand held it steady and trying to tell the wires to screw themselves for a few seconds while I got the piece connected. Guh. TAIL » Click to show Spoiler - click again to hide... « 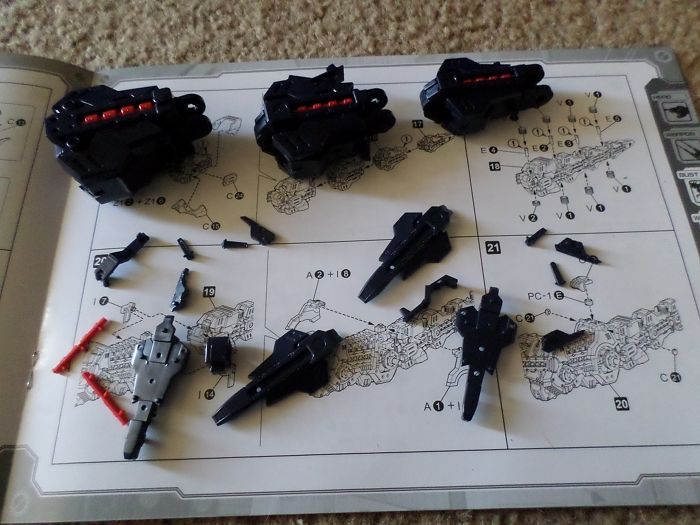 The tail was stupid in similar ways to the body. These flap parts in the tail require everything to fit literally perfectly and never lose in any way any of their size. Which doesn't happen. Ever. So the flaps flap around with gravity, and some parts just won't stay together at all because like every part in each tail section is put together with a similar requirement. I actually had to pull out the glue for this because some pieces in one of the tail sections were not staying together no matter what I did. I shouldn't have to glue a noglue model, yo. THE FABULOUS CANNONS ON ITS BACK. » Click to show Spoiler - click again to hide... « 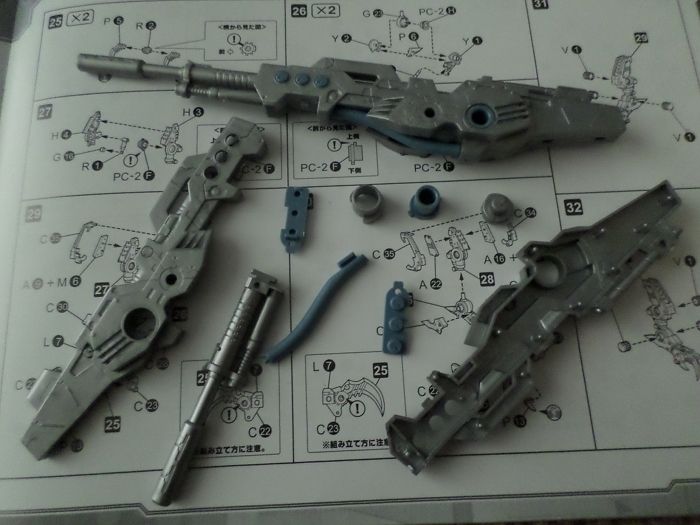 I've got nothing to say about them. I was putting them together while watching some movie called Piranha that only had like one piranha in it ever and it was never of any relevance. But look at them guns. The size impresses me. But the amount of pieces does not. I expected at least fifty. THE ARMS AND THE LEGS. » Click to show Spoiler - click again to hide... « 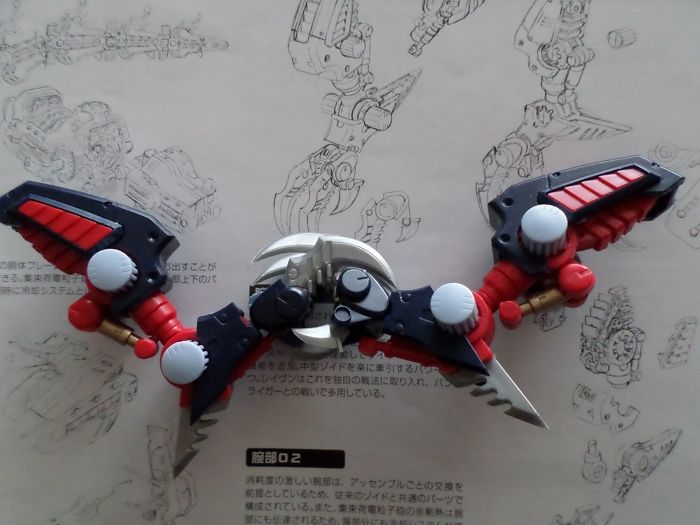 I don't know what to say. I didn't take any pictures of arms or legs while making, so I just pulled them off and put these arms together. Cutely. Those elbow spikes are super extremely sharp. The claws are also really sharp, which makes me sort of not care that the wrist pivots and the claws can, like, clamp. Because I don't want to put my fingers over there at all. I was also really excited for wires when I saw extendedhands on the box but it turns out extendedarms is just a longer plastic part to hold the hand in. Laaaame. 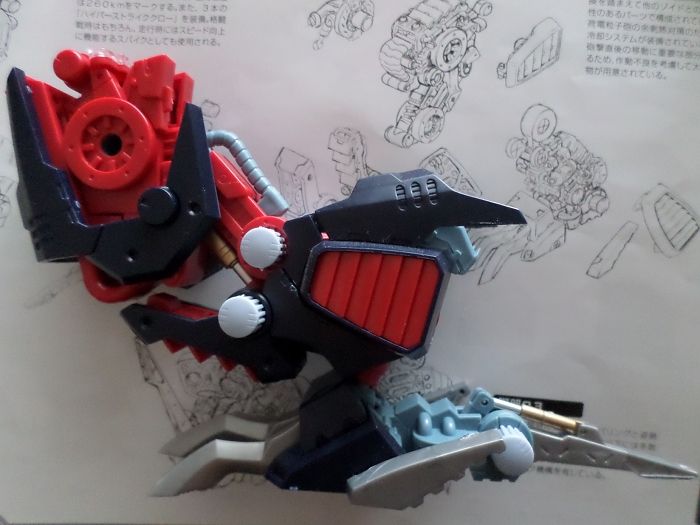 I made a leg do this because it could and I'm not entirely sure why it can. Except I know that it is to accomodate a low body position for reaching for things at lonely tea parties. Also I don't like how small and unimposing the leg seems near the middle of the whole thing. You've got this small chunk of random plastic bits, and some random armor flap that isn't even attached to anything else and that's it. At least the footlock part is kinda cool. You see that little gold pipe attached to it in this picture? When you put the footlock back up it slides over that silver bit. It's cooler to slide it out, actually, but it's generally cool. I also have some vague memory of some claw part going flying off behind my music stand (ver far away) right after cutting one of the connecting parts. They, too, are sharp. FINISH THEM » Click to show Spoiler - click again to hide... « 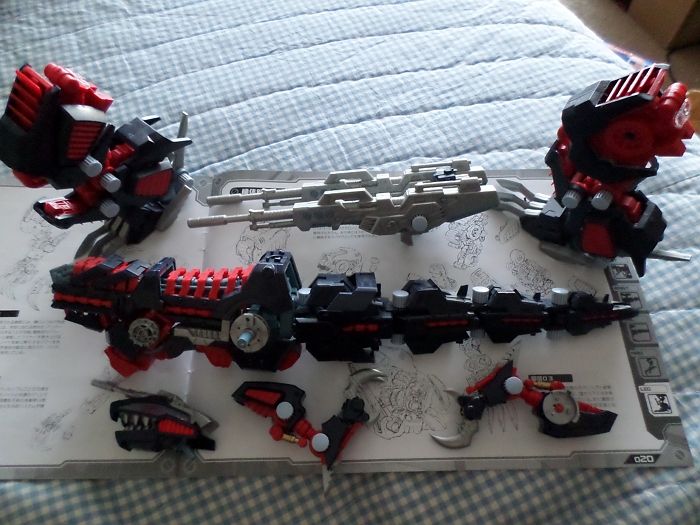 All these parts to stick together. How am I even going to. 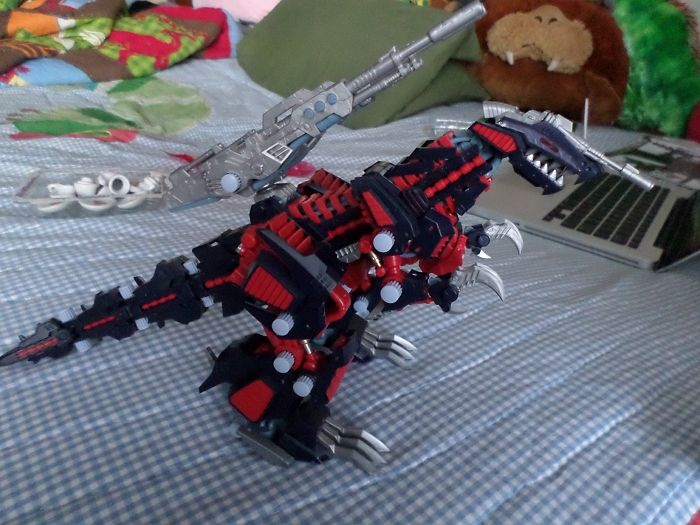 Probably should have put all that tea stuff away before taking this picture. But there you go. I like making him stand like this instead of his whole body being horizontal always and I thank Kotobukiya for poseability. 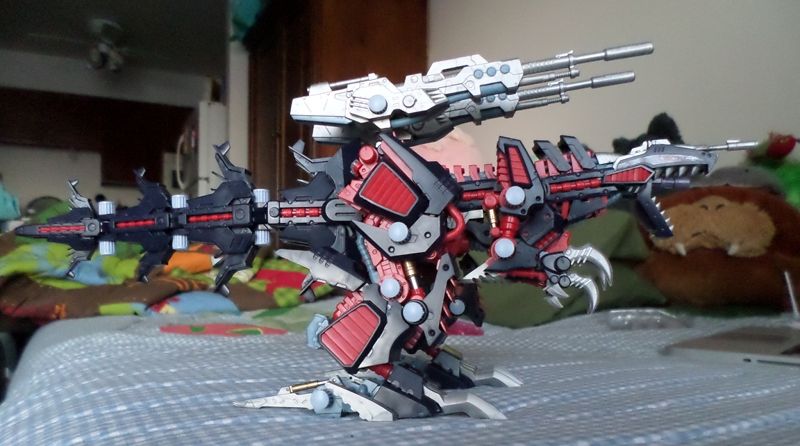 Stupid tailflaps. You have to pull them each out individually. They're not pushed out by some clever design or anything. And they're still subject to gravity, which is why some of them are imperfectly placed. Perfectly placing them would have caused them to hang limply from the thing and that's dumb. stupid tailflaps. There's no red expandy bits. I don't like them. They're bad. They're stupid. At least my glue held up. Also that light was really intense. Oh well. 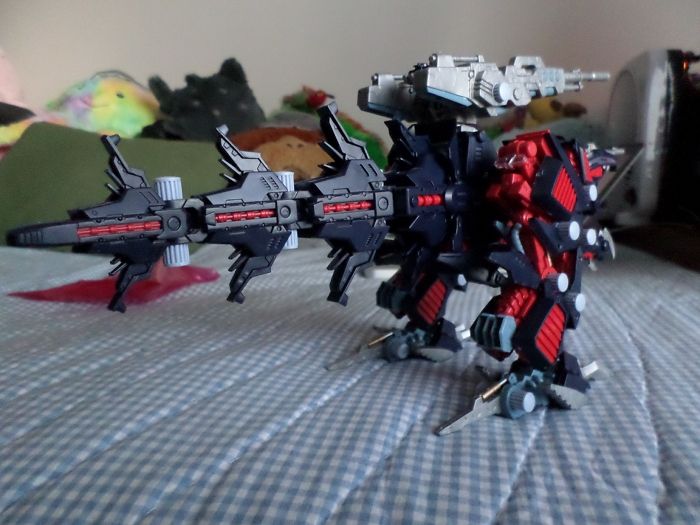 The butt picture you've all been waiting for. 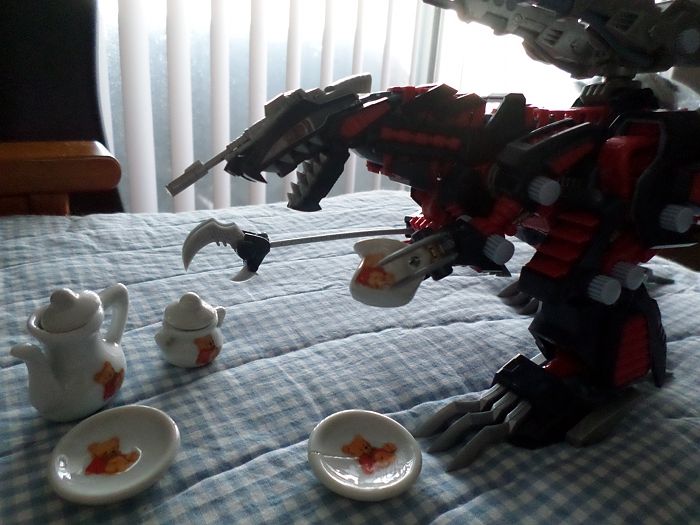 THE TEA TIME PICTURE YOU ALL DESERVE
~~~
 |
|
|
|
|
|
| Rhiannon |
 Oct 1 2016, 06:06 PM Oct 1 2016, 06:06 PM
|

I'm really moved by the chicken bone
           
Group: Gods
Posts: 2033
Joined: 23-December 05
From: Minnesotablarg
Member No.: 4

|
More things because why not. The Draken I posted earlier was from the MechaCollection Macros Delta line. But before that I got Hayate's Siegfried for the same price, with the same source of money (so much swag). MECHACOLLE MACROSS DELTA SIEGFRIEDS FOLLOW: » Click to show Spoiler - click again to hide... «  And after the Draken I did it AGAIN and got Arad's Siegfried instead, because its colors aren't boring and make it seem kinda pro or older or something. Instead of just HERP DERP STANDARD BLUE AND WHITE YOU SEE IN LITERALLY EVERYTHING. I also think I did a much better job of putting the stickers on to it this time.  I also finally took pictures of the Kapool Asaph bought for me, though I still didn't try to do any detailing/aging and I still haven't done anything about the eye sticker that disappeared off the face of the earth after I dropped it by accident... So here are those pictures: » Click to show Spoiler - click again to hide... «  I'm kinda disappointed with how it turned out... The color seems like it's far too vibrant, and I think I've just been spoiled by building Zoids models my entire life, which are ridiculously priced compared to the original price this thing was supposed to go for and are typically a lot more detailed and accurate. But I am glad to have my favourite mobile suit. There's probably only one or two others that I'd even want to own. It's still cute even with its imperfections. So, I present to Asaph, the purchaser of this gift, a nice, thankful bow. 
~~~
 |
|
|
|
|
|
|
  |
1 User(s) are reading this topic (1 Guests and 0 Anonymous Users)
0 Members:
Invision Power Board
v2.1.4 © 2024 IPS, Inc.
|
 Aug 10 2014, 05:37 PM


 Aug 10 2014, 06:07 PM


 Aug 10 2014, 06:46 PM


 Aug 31 2014, 08:46 AM


 Dec 30 2014, 01:03 AM


 Aug 19 2016, 11:58 AM


 Oct 1 2016, 06:06 PM


 Dec 25 2017, 01:07 AM


